[Tech] How we do icon coloration at runtime #Objective-C #iOS
Written by Dumè Siacci on

GoodBarber allows you to create full customized, beautiful apps, in just a few clicks. Among the hundreds of other features, we implemented an icon coloration process, which you can use to create beautiful design effects.
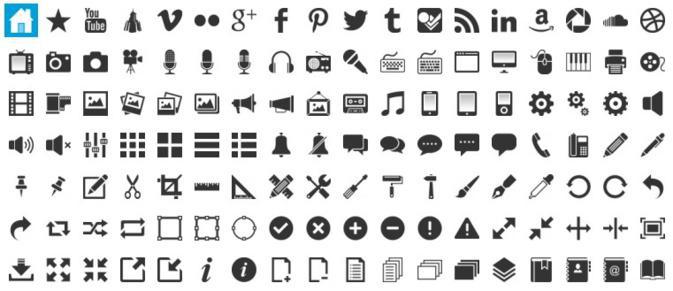
We chose to let you choose amongst a large icon set — you can even upload your own TabBar icons — and you can imagine that it was completely impossible to anticipate all the customization possibilities. So we started to think about an automated customization process for these icons, and we wanted to keep a standard-based icon set (white PNGs with alpha channel only).
So here is what we developed to color the icons directly in the native client applications, with just a white PNG and a hexa color.
Color an image with CGImageCreateWithMask

The most pertinent function to color an image using a mask (our icon set) is CGImageCreateWithMask. This function takes a first parameter, the image to cut with the mask (the color), and a second parameter, the mask itself (the icon). Basically, the mask is a greyscale image, in which the white pixels are ignored and the black ones are kept, in alpha channel, according to their black intensity. So, we need to transform our original image to respect this specification.
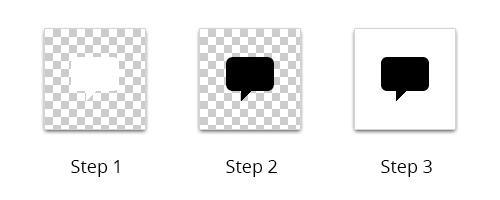
We will follow two steps : create a negative image from our original image (white pixels need to become black), and add a white background.
We choosed to create an UIImage category.
We will follow two steps : create a negative image from our original image (white pixels need to become black), and add a white background.
We choosed to create an UIImage category.
Create a negative image and replace the alpha with a white background

-(UIImage *) negativeImage

	{

	    UIGraphicsBeginImageContext(self.size);

	    CGContextSetBlendMode(UIGraphicsGetCurrentContext(), kCGBlendModeCopy);

	    [self drawInRect:CGRectMake(0, 0, self.size.width, self.size.height)];

	    CGContextSetBlendMode(UIGraphicsGetCurrentContext(), kCGBlendModeDifference);

	    CGContextSetFillColorWithColor(UIGraphicsGetCurrentContext(),[UIColor whiteColor].CGColor);

	    CGContextFillRect(UIGraphicsGetCurrentContext(), CGRectMake(0, 0, self.size.width, self.size.height));

	    UIImage *negativeImage = UIGraphicsGetImageFromCurrentImageContext();

	    UIGraphicsEndImageContext();

	    return negativeImage;

	}
- (UIImage *) imageWithWhiteBackground
{
UIImage *negative = [self negativeImage];
UIGraphicsBeginImageContext(negative.size);
CGContextSetRGBFillColor (UIGraphicsGetCurrentContext(), 1, 1, 1, 1);
CGRect thumbnailRect = CGRectZero;
thumbnailRect.origin = CGPointZero;
thumbnailRect.size.width = negative.size.width;
thumbnailRect.size.height = negative.size.height;
CGContextTranslateCTM(UIGraphicsGetCurrentContext(), 0.0, negative.size.height);
CGContextScaleCTM(UIGraphicsGetCurrentContext(), 1.0, -1.0);
CGContextFillRect(UIGraphicsGetCurrentContext(), thumbnailRect);
CGContextDrawImage(UIGraphicsGetCurrentContext(), thumbnailRect, negative.CGImage);
UIImage *newImage = UIGraphicsGetImageFromCurrentImageContext();
UIGraphicsEndImageContext();
return newImage;
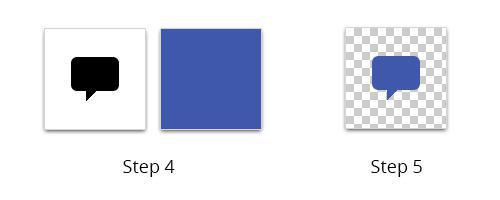
}Once we've obtained a mask with the right specifications, we can apply on a plain color image (or a texture) using CGImageCreateWithMask.
Apply a plain color image to the mask

+ (UIImage *) image:(UIImage *)image withMaskColor:(UIColor *)color
{
UIImage *formattedImage = [image imageWithWhiteBackground];
CGRect rect = {0, 0, formattedImage.size.width, formattedImage.size.height};
UIGraphicsBeginImageContextWithOptions(rect.size, NO, 0);
[color setFill];
UIRectFill(rect);
UIImage *tempColor = UIGraphicsGetImageFromCurrentImageContext();
UIGraphicsEndImageContext();
CGImageRef maskRef = [formattedImage CGImage];
CGImageRef maskcg = CGImageMaskCreate(CGImageGetWidth(maskRef),
CGImageGetHeight(maskRef),
CGImageGetBitsPerComponent(maskRef),
CGImageGetBitsPerPixel(maskRef),
CGImageGetBytesPerRow(maskRef),
CGImageGetDataProvider(maskRef), NULL, false);
CGImageRef maskedcg = CGImageCreateWithMask([tempColor CGImage], maskcg);
CGImageRelease(maskcg);
UIImage *result = [UIImage imageWithCGImage:maskedcg];
CGImageRelease(maskedcg);
return result;
}
We could easily imagine how to adapt this piece of code to apply a texture, as an image, instead of a plain color.
To optimize the process, it's useful to cache the UIImage object generated (on the file system, or memory), instead of making a call of this function each time the image is displayed.
To optimize the process, it's useful to cache the UIImage object generated (on the file system, or memory), instead of making a call of this function each time the image is displayed.
Useful links
- Apple Official Documentation : Bitmap Images and Image Masks in the iOS documentation