GoodBarber's Online Help
Stripe settings
Stripe offers a series of tools enabling you to accept payment in your app.
By activating Stripe in your shop, your clients will be able to:
- pay their orders by credit cards
- pay their orders with a credit card saved on browser (API Request)
- pay their orders with a credit card saved in your shop (Client account)
- pay their orders by Apple Pay
GoodBarber doesn't take any transaction fees on your sales, but Stripe bills you directly its service fee which are set depending on your Stripe account modalities and the country in which your shop is registered.
You can find the detailed Stripe pricing here: https://stripe.com/pricing .
GoodBarber chose to integrate Stripe as a mode of payment because it is a robust, secure and very easy to use service.
Use Stripe as payment system
Start by setting Stripe in Test mode to simulate payments in your shop using the tools offered by Stripe.
For example you can test your clients different journeys during checkout.
In its user guide, Stripe provides different card numbers to do your tests.
For more info: https://stripe.com/docs/testing
Once you've completed all your tests, you'll need to set and enable the live mode to accept payments in your shop. With this mode, you are really taking payments from you clients.

Test mode settings
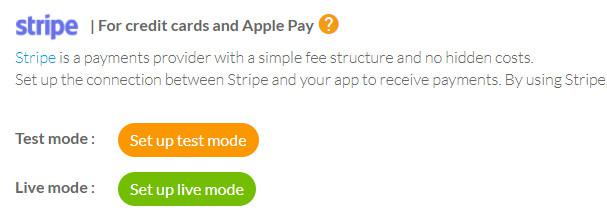
Go to Settings > Payment , in the section set for Stripe, click " set up test mode"
You will be redirected to a page on the Stripe site.
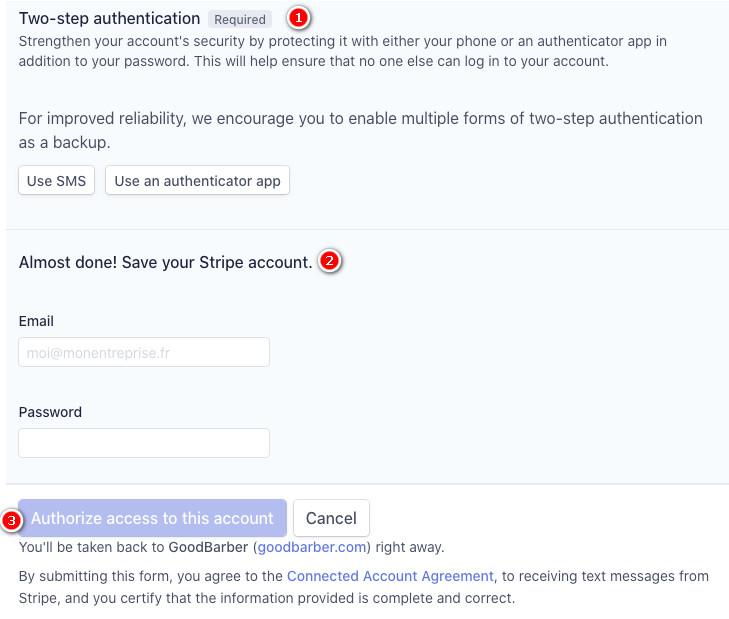
1. Fill in all details regarding your shop like its address, your bank details to collect your payments, and also your phone number to enable the Two-step authentication (Required).
2. Create a new Stripe account at the end of the form, if you already have a Stripe account, you can login at the top right of the form.
3. Once you have completed the form, click the "Allow access to this account" button and you will be redirected to your back office and the test mode will be enabled.

Live mode settings
Your tests are completed, you can now move on to the live mode.
1. Go to the menu Settings > Payment
2. Click "set up live mode". You will be redirected to a page on the Stripe site.

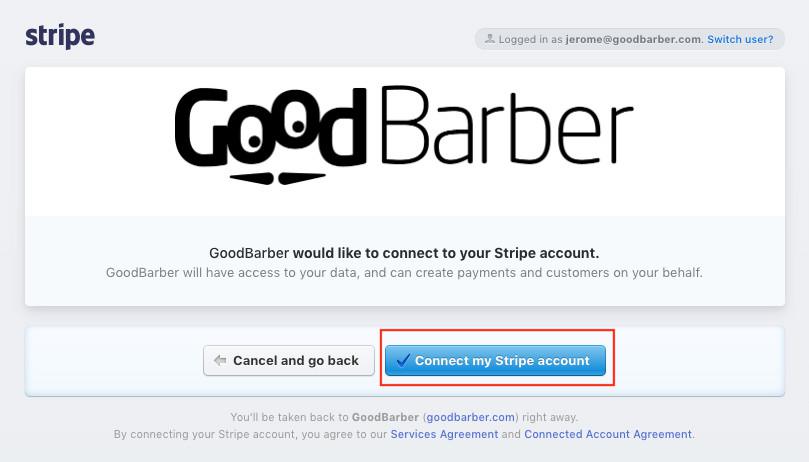
When creating your test account, you created a Stripe account and should be already logged in.
3. Click "Connect my Stripe account" to enable the live mode, you will be redirected to your back office and the Stripe live mode will be activated in your shop.
You can now activate Apple Pay , as a reminder Apple is only available on the live mode.
You can also now activate Stripe Extended payment methods .

Enable live mode and start taking payments
Once all your test are completed with both test card numbers in Stripe test mode, then with real credit cards in Stripe live mode, it's time to pass your project in live mode to start taking payments.

Reset button?
If you use several Stripe accounts, you could have made a mistake while setting your test or live mode.
The reset button allows you to completely reset your settings.
It will reset your configuration, you'll be able to start a new one.
- Introduction to payment gateway
- Quick testing gateway
- Stripe settings
- Paypal Settings
- Offline payment
- Test mode / Live mode
- Display of the different payment methods in the checkout process
- Credit Card saved on browser (Payment Request API)
- Credit card saved in your shop (Client account)
- Apple Pay
- Stripe Extended payment methods